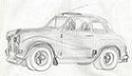
The Project
 Get ready for the re-build project .....
So what have I found ...
The car's not in bad shape ... in that there is very little rust apart from what
appears to be a hole in the outer sill on the driver's side. Driver's floor and
inner sill feel solid. No rust appears to have affected bottom of front wings but
I haven't seen the front of the car yet due to rubbish piled up in front.
Driver's door opens and closes properly but passenger door has dropped. Boot's OK.
All glass is in place but driver's door seal is ripped off (outside along top of
door panel).
Bottom of rear wings are not bad. Small rust 'bubbles' in that area are starting to
show but not extensive - just behind the wheel arch "bump" and as the wing rounds
behind the bumper.
Bonnet has been damaged. Boxes piled on top by a muppet (brother) have pushed
this in. Luckily I've been offered a spare one so just have to pick that up. Can't
see the Flying-A but may look to modernise this ...
Paint work is poor as most of the top-coat is scratched and the prep wasn't great, so
it's flaking. Not a big issue as the car was going to be re-sprayed completely anyway.
Rear bumper, and hoping front, is in really good condition but these were replaced in
mid-70s with exchange units as might were awful and had a few dings and bends. IIRC
got them from Halfords!!
Tyres are flat ... after 30+ years am I surprised? Handbrake is off, so hopefully
not seized on.
Next up? Arrange to bring the car home ... that was done in December 2019!
So an update on the bodywork.
It wasn't quite as good as I described, but not as bad as it could have been.
There was a bit of a crusty patch on the n/s A-post near the top door hinge
mount but rather than cut it out completely I cut-out the rusty area and patched
it. Added a bit of strength behind too. That was my first real attempt a welding
and it went a lot better than I expected. I didn't set the car on fire either ...
or me! (Welding proof overalls help!). Since then I had set a glove alight as I
decoded to do a quick patch without wearing the thick leather welding gloves!
There were some holes in the floors in the outer front corners where the "jig
boxes" were fitted to move the bodies in the factory. After 60 years these are
just right shape to collect dirt and mud and slowly rot the floor away. Both
have now been cut-out and patched with new floor panels. There was also a
small section on the nearside that was thin and holed so that was cut-out and
another patch welded in. As it was shaped I used a piece from the driver's
floor that I had cut-out. The jog-boxes will NOT be replaced.
There were two splits in the rear of the floors where the seats landed when
tipped back and this has stressed the steel over time. Both now welded up..
A small hole at the rear of the floor pan where it meets the heelboard. Again
welded up and reinforcement plates fitted beneath where the seatbelts are bolted down.
Both wings well need patching as I expected at the bottom rear which is also a
mud-trap. N/S wing needs a lot of work around the headlamp area due to accident
damage. And patches are going to be needed in the front panel where the wings
bolt up to as well as where the panel meets the front valance. Oh and a new valance!
I've sourced new bolts, like large self-tappers, J-Clips and washers to cover both wings.
Rusting in the rear wings towards the bottom where I expected(again a water trap), and
along the rear panel where the rear valance used to be! That was removed, not
nicely, when the car got a gentle rear-ending which bent the bumper and crushed the
valance. Also a couple of smaller holes in the corners of the boot floor.
I've also removed all the old paint and filler from the front panel and the exterior
of both front wings. Both had been replaced with dark Green wings as the o/s had at
some point had a whack as the crumpled inner wing showed.
Both sills are going to be replaced as they are rotten along the bottom and the
nose-piece which is normally hidden behind the bottom of the wing. The same bottom
corner that is a dirt-trap. I had a small patch in the o/s inner sill which was a
bit "holey" so that has been cut out and replaced. Chance to use a "joggler" and
practice welding up punched holes.
Haven't even started on the doors! The nearside door didn't shut properly either
and that seems to be down to a very worn hinge ball. These are similar to the old
Land Rover Defender type of of hinge pin and either a ball or cone shape. I seem
to have three cones and one ball on my car. My n/s door is not the original and
that is where the odd ball comes in.
Oh and that bonnet? The dent "popped" out! About a week after I bought one off a
Club colleague which has louvres pressed into it. I dropped the bonnet closed by
accident one afternoon when working on the car and the dent just popped out. Looks
OK so I will probably keep it as a spare now. I may actually leave it in the "LeMans
Blue" that the car had been repainted in as a reminder.
Car has been affectionately christened "Bitza" .. mainly because the end product is
going to bits of this and bits of that .. mainly A35, Midget and some Metro parts.
So my welding skills, if you can call them that, are improving! Although I think that
may also be down to a couple of good angle-grinders and an assortment of discs!
Project Phases
- Build the engine and store
- Engine build is progressing .. see "Power!" tab for
more details.
Get car home
Strip to shell and see what is needed in way of welding, etc.
- Rust proof and paint shell including Raptor anti-chip on underside
- Rebuild from ground up, so start with suspension, then brakes including new
kunifer brake lines, braided hoses, etc
- Fit new fuel tank, electric pump and new kunifer fuel lines
- Install new custom loom with extra fuses, relays, etc .. based on a modular system
- Install engine and gearbox and get running
- Interior work

